使用Dockerfile基于5.7镜像搭建MySQL微服务环境【20210517】
介绍
介绍
大家根福哥学会了使用Dockerfile创建Docker镜像的技巧了,那么我们现在搭建服务器环境就不需要再去下载软件的源代码了,也不需要编译安装了,更加不用操心软件和操作系统的各种兼容问题了。
今天福哥带着大家来安装mysql的环境,MySQL是数据库引擎,和php、python不同之处在于MySQL是不能简单地通过k8s进行负载均衡的,而且MySQL的数据库的数据会持续更新需要持久化保存起来,这些我们在本课都可以跟福哥学到。
镜像
tag
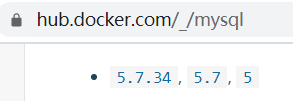
虽然MySQL已经出了8版本,但是福哥还是选择了兼容性比较好的5.7版本。
结构
照例我们先把镜像拉取下来,然后启动一个容器,看看里面都有什么,弄明白了自己才好捣鼓啊!
拉取镜像
docker pull mysql:5.7
创建数据卷
和前面的php和python不同,我们需要建立一个数据卷用来给MySQL存储数据使用。
docker volume create mysql5.7
启动临时容器
启动容器的时候需要指定数据卷映射到容器内部,还要通过MYSQL_ROOT_PASSWORD指定root账号的密码。
docker run -tid --name mysql5.7 -h mysql5.7 -v mysql5.7:/var/lib/mysql -e MYSQL_ROOT_PASSWORD=abcdef mysql:5.7
切入临时容器
docker exec -ti mysql5.7 /bin/bash
查看结构
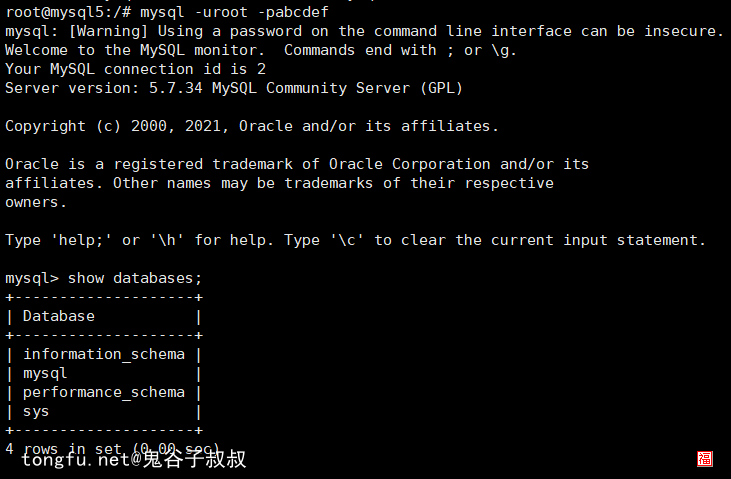
使用默认的root密码登录mysql,使用show databases查看默认数据库。
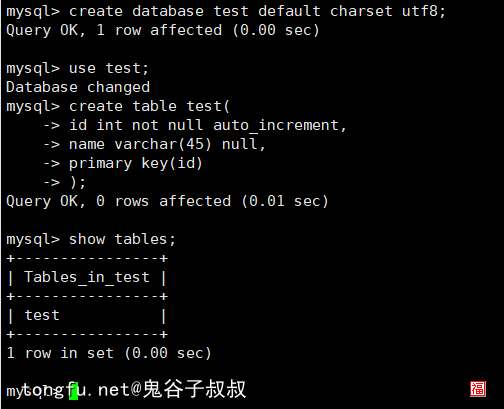
 创建一个test数据,再在里面创建一个test数据表。
停止临时容器
docker stop mysql5.7
删除临时容器
docker rm mysql5.7
重建临时容器
我们选择重新建立一个临时容器,记得使用相同的数据卷。

测试数据卷
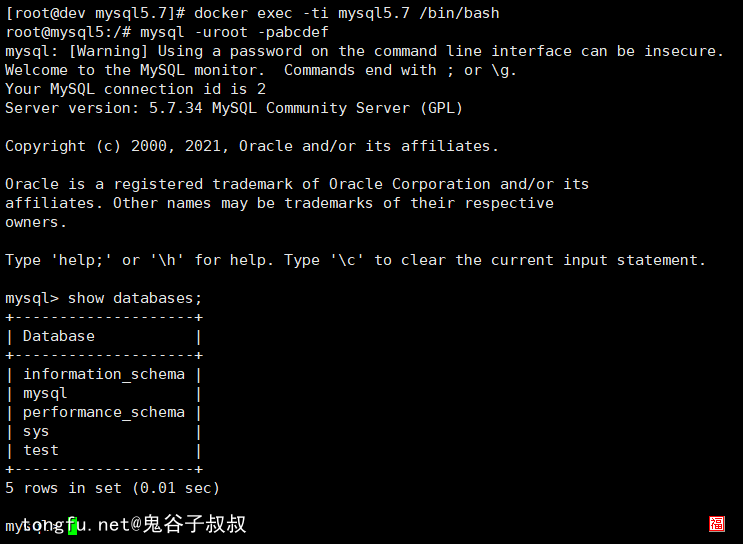
进入临时容器,连接mysql终端,会发现我们刚刚建立的test数据库依然存在着,达到目的了~~
手动安装
福哥先在临时容器里面手动安装一遍环境,然后再整理到Dockerfile里面,这样大家会看得比较清楚一些~~
配置文件
MySQL的配置文件在/etc/mysql/mysql.conf.d/mysqld.cnf里面,我们可以在制作Dockerfile时候根据自己的情况进行自定义的配置。
/etc/mysql/mysql.conf.d/mysqld.cnf
root@mysql5:/# cat /etc/mysql/mysql.conf.d/mysqld.cnf
# Copyright (c) 2014, 2021, Oracle and/or its affiliates.
#
# This program is free software; you can redistribute it and/or modify
# it under the terms of the GNU General Public License, version 2.0,
# as published by the Free Software Foundation.
#
# This program is also distributed with certain software (including
# but not limited to OpenSSL) that is licensed under separate terms,
# as designated in a particular file or component or in included license
# documentation.  The authors of MySQL hereby grant you an additional
# permission to link the program and your derivative works with the
# separately licensed software that they have included with MySQL.
#
# This program is distributed in the hope that it will be useful,
# but WITHOUT ANY WARRANTY; without even the implied warranty of
# MERCHANTABILITY or FITNESS FOR A PARTICULAR PURPOSE.  See the
# GNU General Public License, version 2.0, for more details.
#
# You should have received a copy of the GNU General Public License
# along with this program; if not, write to the Free Software
# Foundation, Inc., 51 Franklin St, Fifth Floor, Boston, MA  02110-1301 USA


#
# The MySQL  Server configuration file.
#
# For explanations see
# http://dev.mysql.com/doc/mysql/en/server-system-variables.html


[mysqld]
pid-file	= /var/run/mysqld/mysqld.pid
socket		= /var/run/mysqld/mysqld.sock
datadir		= /var/lib/mysql
#log-error	= /var/log/mysql/error.log
# By default we only accept connections from localhost
#bind-address	= 127.0.0.1
# Disabling symbolic-links is recommended to prevent assorted security risks
symbolic-links=0
福哥这边只进行了如下的一些配置调整。
server_id = 131415926

# log bin
log-bin=mysql-bin
binlog-do-db=tfapi_utf8
expire_logs_days=10
max_binlog_size=1G
binlog-format=row

# performance
max_allowed_packet=104857600

# innodb
innodb_flush_log_at_trx_commit = 2 # 0 - no writen, 1 - writen everytimes, 2 - writen per second

# sql
sql_mode = 'NO_AUTO_CREATE_USER,NO_ENGINE_SUBSTITUTION'
Dockerfile
最后福哥把前面的设置命令整理到一起写成Dockerfile,这样大家就可以通过Dockerfile安装环境了。
my-extra.cnf
首先福哥建立了一个扩展的配置文件my-extra.cnf,把自定义的参数写到里面去,导入到镜像里面。
# server id
server_id = 131415926

# log bin
log-bin=mysql-bin
binlog-do-db=tfapi_utf8
expire_logs_days=10
max_binlog_size=1G
binlog-format=row

# performance
max_allowed_packet=104857600

# innodb
innodb_flush_log_at_trx_commit = 2 # 0 - no writen, 1 - writen everytimes, 2 - writen per second

# sql
sql_mode = 'NO_AUTO_CREATE_USER,NO_ENGINE_SUBSTITUTION'
Dockerfile
创建Dockerfile,将my-extra.cnf导入进来,用完后再删除掉。
FROM mysql:5.7

MAINTAINER Andy Bogate
MAINTAINER tongfu@tongfu.net
MAINTAINER http://docker.tongfu.net

EXPOSE 3306

# config
ADD my-extra.cnf /tmp/my-extra.cnf
RUN cat /tmp/my-extra.cnf >> /etc/mysql/mysql.conf.d/mysqld.cnf

# clear
RUN rm -f /tmp/my-extra.cnf
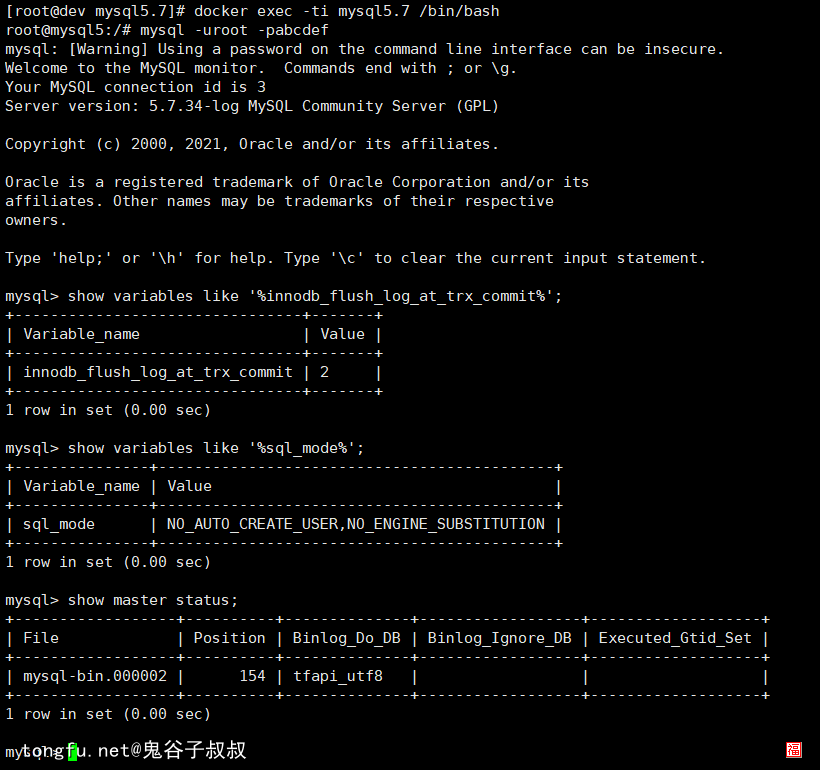
创建完镜像,启动一个容器,进去里面登入mysql终端,可以看到我们在my-extra.cnf里设置的参数生效了!
总结
今天福哥带着大家使用Dockerfile搭建了MySQL微服务环境了,可以发现使用Dockerfile方式搭建环境我们真的只需要关心我们需要关心的部分,繁琐的编译参数、依赖库、环境参数等等一系列的问题基础镜像都给我们解决好了。
下一课,福哥会带着搭建学习使用Dockerfile搭建Redis环境,敬请期待~~
相关文章推荐
- 通过VMware安装CentOS 7操作系统【20200904】 阅读:182
- Vue学习笔记 阅读:673
- 做个java框架(4)——MD5编码和Base64编码【20210102】 阅读:52
- Python编程中的字符串编码转换问题【20201012】 阅读:126
- Java的FreeMarker模板引擎的几种模板加载方式【20210418】 阅读:272
- 通过Nginx反向代理Rancher以及使用内网部署k8s集群的方法【20220520】 阅读:570
- Rancher(k8s)的负载均衡Load Balancing(LB)的使用方法 阅读:139
- Docker的几种精简版本Buster、Alpine、Stretch比较【20210513】 阅读:363
- Rancher v2.5.9使用Dockerfile部署php-fpm和nginx服务的方法【20211016】 阅读:160
- Python实现PHP语言的序列化和反序列化功能【20210625】 阅读:91
