SpringBoot实现不同环境下多个配置文件的使用技巧【20211123】
介绍
介绍
福哥今天交给大家如何给SpringBoot项目根据不同的环境设置多个配置文件以及如果动态切换配置环境的方法,大家都知道一个项目从开发,到测试,到发布都会经历多个环境,这些环境的参数大多数都是不一样的,为了避免每次切换环境就需要编译一遍项目的问题,SpringBoot设置了多个配置文件的解决方案。
大家都知道SpringBoot默认的配置文件是application.properties,那么这一个配置文件肯定是无法满足多个环境的需要的,那么各位就随着福哥去学习如何配置多个环境的参数吧!
配置
profile
首先,我们要在pom.xml里面的project节点下面添加profiles节点,告知系统我们准备了多个环境配置。
福哥建立了四个环境,分别是:idea(IDEA调试环境),develop(本地开发环境),test(测试环境),product(生产环境)。
<profiles>
    <profile>
        <id>idea</id>
        <properties>
            <env>idea</env>
        </properties>
    </profile>
    <profile>
        <id>develop</id>
        <properties>
            <env>develop</env>
        </properties>
    </profile>
    <profile>
        <id>test</id>
        <properties>
            <env>test</env>
        </properties>
    </profile>
    <profile>
        <id>product</id>
        <properties>
            <env>product</env>
        </properties>
    </profile>
</profiles>
application.properties
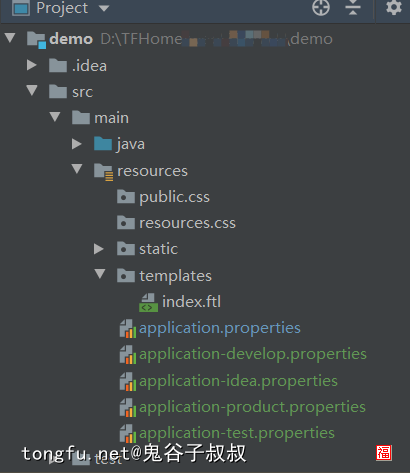
接着我们就要对应的准备四个配置文件了,这个默认的配置文件不能算在里面,也就是说一共会有五个配置文件。
除了默认的application.properties之外,其他的配置文件的命名规范是:
application-[profile name].properties
所以,福哥这边建立了application-idea.properties、application-develop.properties、application-test.properties和application-product.properties四个环境配置文件。

切换环境
然后就是控制在不同配置文件之间切换的问题了。因为我们运行项目的方法很多,所以控制不同配置文件之间切换的方法也不尽相同,下面福哥就把几个常用的方法交给大家。
默认
如果不设置的话,不会加载其他配置文件,只会加载application.properties这个默认的。

pom.xml
第一个方法是通过pom.xml来控制,这个配置的内容比较多,大家要看仔细了哦~
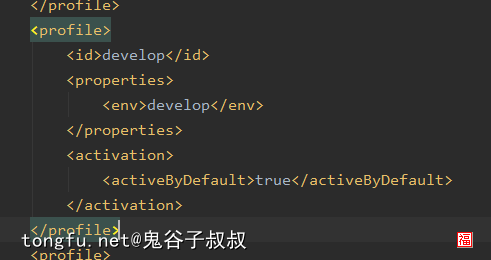
在pom.xml的profiles节点里面找到需要启用的profile节点,增加activation节点。
<profile>
    <id>idea</id>
    <properties>
        <env>idea</env>
    </properties>
    <activation>
        <activeByDefault>true</activeByDefault>
    </activation>
</profile>
在pom.xml的build节点里面添加resources节点,在里面添加resource设置。福哥这里设置的是两段resource,第一段的意思是在src/main/resources/目录里面去除全部application*.properties文件,第二段的意思是在src/main/resources/目录里面启用过滤功能,引入application.properties这个文件,还启用application-${env}.properties这个文件。
这里面的${env}就是profile > properties > env节点名称。
<resources>
    <resource>
        <directory>src/main/resources</directory>
        <excludes>
            <exclude>application*.properties</exclude>
        </excludes>
    </resource>
    <resource>
        <directory>src/main/resources</directory>
        <filtering>true</filtering>
        <includes>
            <include>application.properties</include>
            <include>application-${env}.properties</include>
        </includes>
    </resource>
</resources>
在application.profiles里面设置激活的profile名称。
这里面的@env@就是profile > properties > env节点名称。
spring.profiles.active=@env@
测试一下,没有问题!


idea
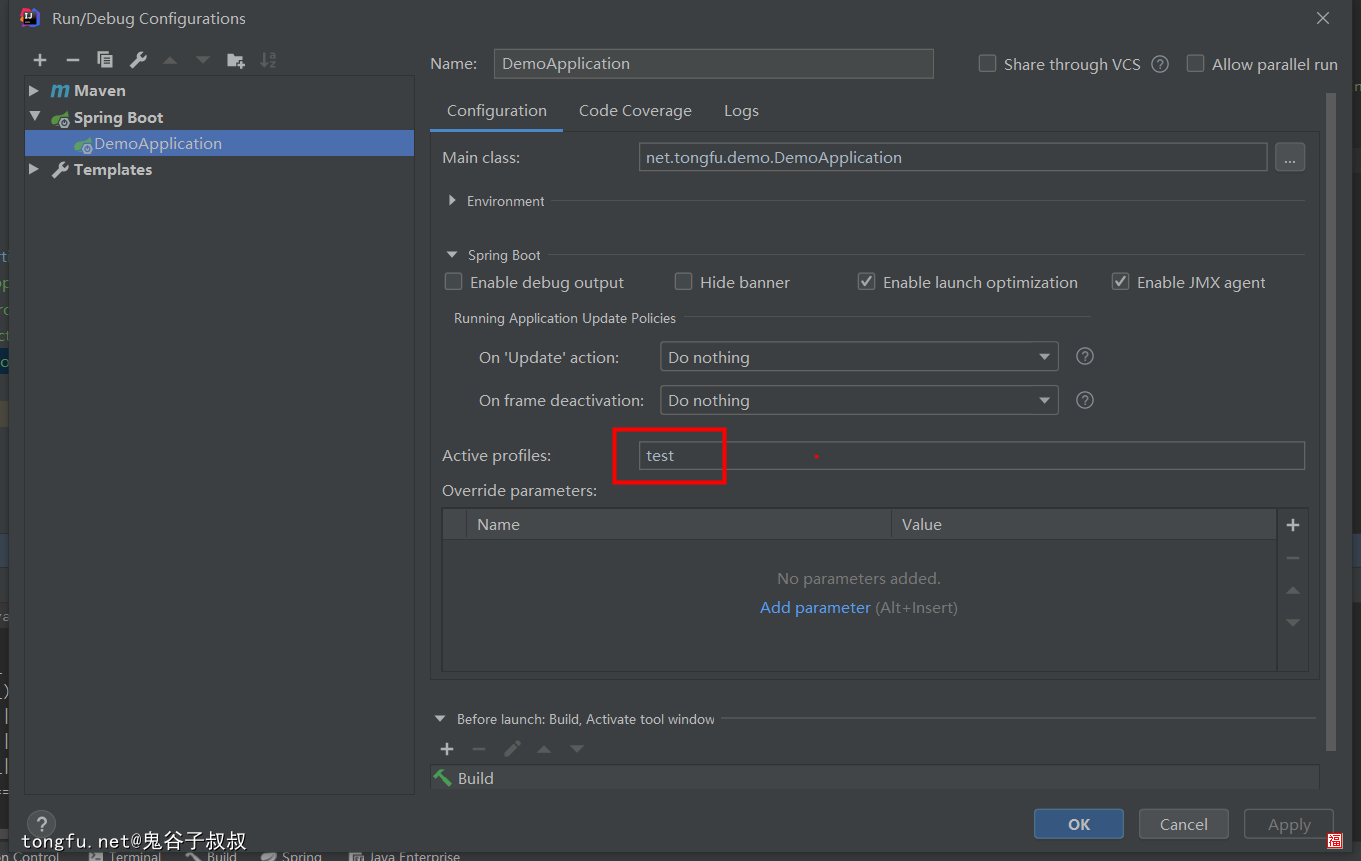
第二个方法是直接在IDEA的配置启动任务里面指定激活的profile名称。

测试一下,没有问题!

Maven
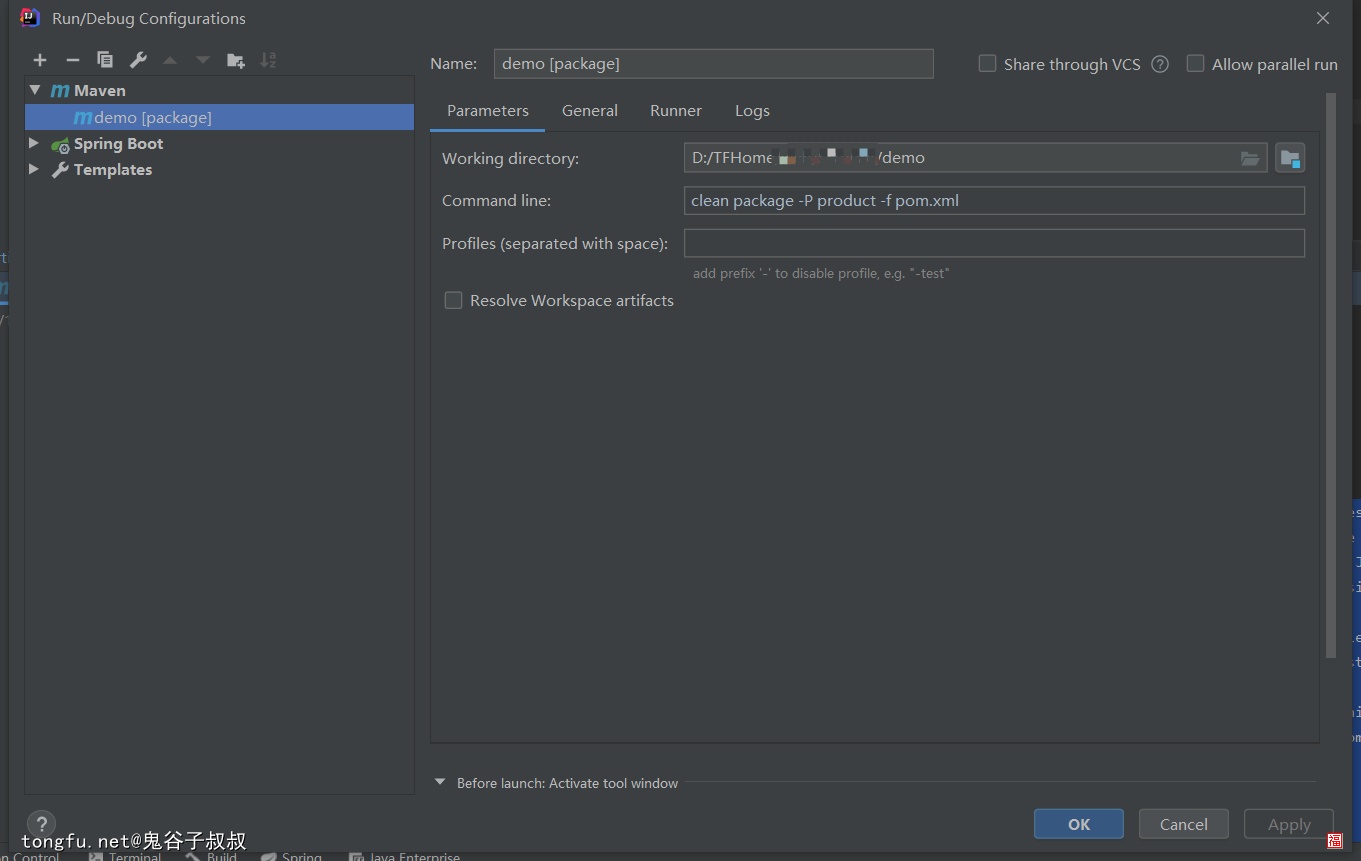
第三个方法是在第一个方法的基础之上的一个拓展,首先我们先配置好pom.xml方法的设置,这个时候激活的profile就是activation节点里面设置的profile名称。然后,我们在用Maven打包项目的时候,可以通过-P参数动态指定profile名称。

测试一下,没有问题!

总结
今天童鞋们和福哥一起把SpringBoot项目的多配置文件的使用技巧学习了一遍,福哥教给大家的几种实现方法基本可以满足大家的日常开发使用的需要了~~
相关文章推荐
- Nginx安装笔记【20201231】 阅读:78
- 映射Windows共享目录到Linux操作系统里面【20200914】 阅读:71
- Gitlab学习笔记 阅读:139
- 做个web框架(20)——邮件发送工具对象TFMail的实现【20201216】 阅读:29
- 选择一个开源协议来保护自己的程序代码【20210119】 阅读:65
- Python做个搜索引擎(2)MySQL数据库设计【20201005】 阅读:108
- 选择一个开源协议来保护自己的程序代码【20210119】 阅读:65
- 在CentOS8配置Python的selenium环境【20211022】 阅读:90
- Python子类调用父类构造函数的方法【20210729】 阅读:41
- 在PHP里实现PKCS7编码功能 阅读:36
